photo home-2.png photo about-4.jpg photo style-2.png photo Projects-2.png


Thursday, April 17, 2014

DIY Mother's Day Tea Towels


With Easter and Mother's Day right around the corner, I thought it would be the perfect time to do this simple diy. If you're anything like me, you wait until the last minute to think about gifts, and then go into a frenzy when you remember Mother's Day is in two days! Hopefully this tutorial can help to remedy that frenzy.


 These tea towels are such great gifts, because they are easy and cheap to make, but they're a gift anyone would love to receive and actually use! 

Here's what you'll need

-Fabric paint in your color of choice (fabric paint is so handy to have around)
-Plain tea towels (I got mine at Walmart)
-Variety of paintbrushes

Let's do this 

-You'll first need to give your towels a little iron, just to get the creases out.

-Lay them out on newspaper, squirt some paint onto a paper plate, and paint away!
What you paint is totally up to you, the possibilities are endless! I am so not creative, so I scoured Pinterest and Etsy for inspiration. 

-Here's the designs I went with:


-Once you finish painting, you'll want to let your towels dry overnight to ensure they are completely dry. When they are, iron over your design according to the instructions on the back of your paint bottle. Mine just needed to be steamed for a couple seconds to set the paint.

And there you have your beautiful tea towels. Mine are clearly very messy, but I am happy with how they came out- honestly these are hard to mess up!


Wrap a ribbon around these and you have a beautiful Mother's day, gift! These can truly be given at any occasion, and the recipient is sure to love and use them!

Blessings,
-Cassidy


Wednesday, April 16, 2014

Warmin' Things Up


So, it's spring (though Tennessee weather is begging to differ), which means there's a good chance we've pulled out the self tanner and now need a face to match our bronze skin, or we just need to add a little life to our pale, winter face. 
(I'm featuring a great self-tanner in my march/april favorites, so watch out for that at the end of april)

So, I made a quick little tutorial on how to get that perfect spring glow. 


With my second cup of of coffee in hand, I applied my eye makeup and base. I powdered to set everything, but if you are using a liquid bronzer or blush, 

Monday, April 14, 2014

Brush Business


We probably all wash (or know we're supposed to wash) our make up brushes, but have you ever thought about your poor hairbrushes? We use these guys everyday, and  between dirt, grease, dry shampoo, hairspray, and whatever else is in our hair, the buildup in our brushes is g r o s s. Seriously, take a close look at your brush, and I promise you will be grossed out. 

The best remedy for this is to give your brushes a nice soak in a cleaning bath. 

Here's what you'll need:

-A splash of white vinegar
-A squeeze of dish soap
-A couple drops of your favorite essential oil (optional)
-Toothbrush (one you clean with)
-Comb

(I know, my measurements are super precise)


^^ Here are my brushes before- dingy and generally gross

First, you'll need to clean all of the hair out that you can with your fingers, then grab your comb and comb through your brush (I know it's weird), and get all of the hair out that you possibly can. 


Next, fill up your sink (bathroom or kitchen works great), with super hot water and add your vinegar, soap, and oil of choice. Drop in your brushes and let those sucka's soak for about 30 minutes. After they've soaked take your toothbrush and scrub away at all that gunk on the bristles.  #mirror selfie


Give them a rinse, and set them out on a towel to dry. Then take a look at how nasty your water was, and breathe a sigh of relief because you're not brushing your hair with that gunk now!


Much better!

I truly do see a difference in my hair after I wash my brushes, and you will too! 
Try this out for yourself when you have a spare afternoon, and show your brushes some love!

-Cassidy

Friday, April 4, 2014

Real Talk // African Black Soap: Skin miracle?


African Black Soap- it seems to be the latest trend in skincare. 

I am always up for trying a new skincare product, especially when I see such raving reviews all over the blogosphere. People (with all skin types), have said that it has cured their acne, evened there skin tone, and given there skin a glow. I haven't tried it for anything except my face, but apparently you can use this stuff as shampoo, body wash, and even to shave with. I got this soap about a month ago, but I wanted to wait at least 4 weeks, to give my skin proper time to adjust and react to it. 

I did a lot of research on this bar before I went out and bought it, and here's what I found out:

-For centuries Ghanaians have used African Black Soap, as it has been known to help to relieve acne, oily skin, clear blemishes, and various other skin issues. It is also known to help soothe skin irritations and conditions such as eczema, rosacea, and psoriasis. African Black Soap is excellent for removing makeup, dirt, and oil. (Source)

- African black soap is made from dried plantain skins, palm leaves, cocoa pod powder, and kernel oil. Plantains skins are largely what make this black soap so effective. It is a natural source of vitamins A & E and iron. When black soap is made, the skin of the plantain is dried under the sun and then roasted in a clay oven. Afterwards, cocoa pod powder is added. Cocoa pod is the shell of the cocoa fruit and also has natural healing properties. The roasted plantain skin is then mixed with palm and palm kernel oil to form the soap. (Source)

With this in mind, I set out to buy myself a bar. I found my bar at Walgreens, but I had to go to two different Walgreens to find one that had the soap. 

The brand I found is called "Shea Moisture," and has Shea Butter added to it, is never tested on animals, and has all certified organic ingredients, which is a huge plus for me. This bar cost me $5, which I'd say is less than any face wash I've ever purchased.


So here's the low down:

I have been using this bar for 4 weeks now, every morning and every night. I've found it to do a great job at removing makeup, oils, and dirt. It really does give you that "squeaky clean" feeling, without drying out your skin. I have very oily skin, so I just need to use a tad of moisturizer after washing with this soap. 

Over these 4 weeks, I haven't exactly seen a miraculous difference, but I can tell a different in my acne and acne scarring. I still break out, but the breakouts are contained, and generally pretty minor,  (knock on wood). My skin tone has really evened out, and the redness is definitely clearing up. My scarring hasn't improved majorly, but I expect that to take longer than a month to improve.

So, to summarize, this product probably isn't going to clear your skin a week, but with consistent use, you will definitely see a difference, and I highly recommend this soap to people with acne and acne scarring.

Blessings,
-Cassidy


Saturday, March 29, 2014

Rainy Saturday


 Today was a cold and rainy spring(?) day. I ran a few errands, but mostly sat at home being cozy, making mixed cd's and drinking tea.
 I finished off the night chatting with girlfriends at Starbucks. All in all, a perfect Saturday. 

Wednesday, March 26, 2014

Real Talk // The cure for oily skin


I'm starting a new series called "real talk."  This series is going to cover beauty myths, the latest products, so called "Pinterest hacks," and all the tips and techniques we hear about, but never really know if they work. 

I'll be giving honest reviews and the low-down on my personal experiences with products and techniques.

This series isn't going to be weekly or anything, just when I try out new things and decide to let you guys know how they are working out for me.

...................................................................................

This time I'm going to discuss my newest love in skincare/makeup:

Milk of Magnesia


I know, you all are thinking "seriously, that's so weird," but trust me on this one.

As of the last month, my skin has been so oily- like, it's been bad. I'll put my makeup on in the morning (including a shine control primer), and by mid-afternoon, it is sliding off and my face is excessively oily- not a cute look. After I talk on the phone I'll look and there will be a print on it from my makeup and oil (TMI, sorry guys). But you get the point. I like oil blotting sheets, but they tend to remove some of my makeup, and I don't like putting more powder on, because it just makes me look cakey. I have tried different primers, but have never found one that has truly kept my oil under control- until now.

I had heard about using Milk of Magnesia as a primer for a while, and I kind of brushed the idea aside because it sounded so weird and gross. But, I recently read more into it and heard somewhere that makeup artists used Milk of Magnesia on Victoria's Secret models to keep shininess to a minimum. That's what pushed me to try it, and I don't think there's any going back now.

I've been using a bottle that we already had in our house, and it's mint scented/flavored, but it doesn't smell minty after a minute or two. I have fairly sensitive and acne prone skin, but I've been using Milk of Magnesia  for about a week and haven't noticed any irritation whatsoever. 

So here's how I apply it-
I wash my face and moisturize, then apply a very thin coat of the milk with my fingers, only on my t-zone. You can use a cotton ball, but I find that I'm able to control how much I put on better with my fingers. You want a very thin layer, or else your skin will have a white cast. I wait about 2 minutes for it to dry, then proceed to apply my face makeup as normal.

Normally (without the Milk of Magnesia), by the end of the day, the majority of my makeup will be gone and my face will be super shiny, but with the Milk of Magnesia my makeup stays intact and I just look slightly dewy- a totally acceptable look. 

This "primer" has been a total game-changer for me, and something I'm definitely going to keep in my routine.

Tuesday, March 25, 2014

Dreaming of spring

Dreaming of spring

Here's my top wishlist for spring/summer:

1. Sunnies from Revolve Clothing
I've been dying for some round sunnies for a while, so hopefully I'll score some in the near future.

2. Shorts from Urban
I neeeed some solid high-waisted jean shorts that I can pair with some crop tops and tanks

3. Maxi from Anthropologie 
I'm in love with maxi's right now-I may end up living in them this summer, because they're so comfy

4. Strappy tank from RVCA 
One of my favorite trends right now is the kind of "strappy" trend, and it looks so nice on this tank. Plus it's a neutral color, and I can't resist that.

5. Sandals by Steve Madden
Sandals are a necessity for me, and I have completely worn all of mine out, so I may have to splurge a bit on a good pair that I can live in in the warm seasons.

Of course, this is a highly unrealistic list, but a girl can dream. I'm hoping to thrift/bargain shop at least a couple of these items.
Ironically it is snowing as I type this- but knowing Tennessee, it will probably be sunny and 70 tomorrow (lets hope so, at least).

What's on your summer/wishlist?
-Cassidy


Monday, March 10, 2014

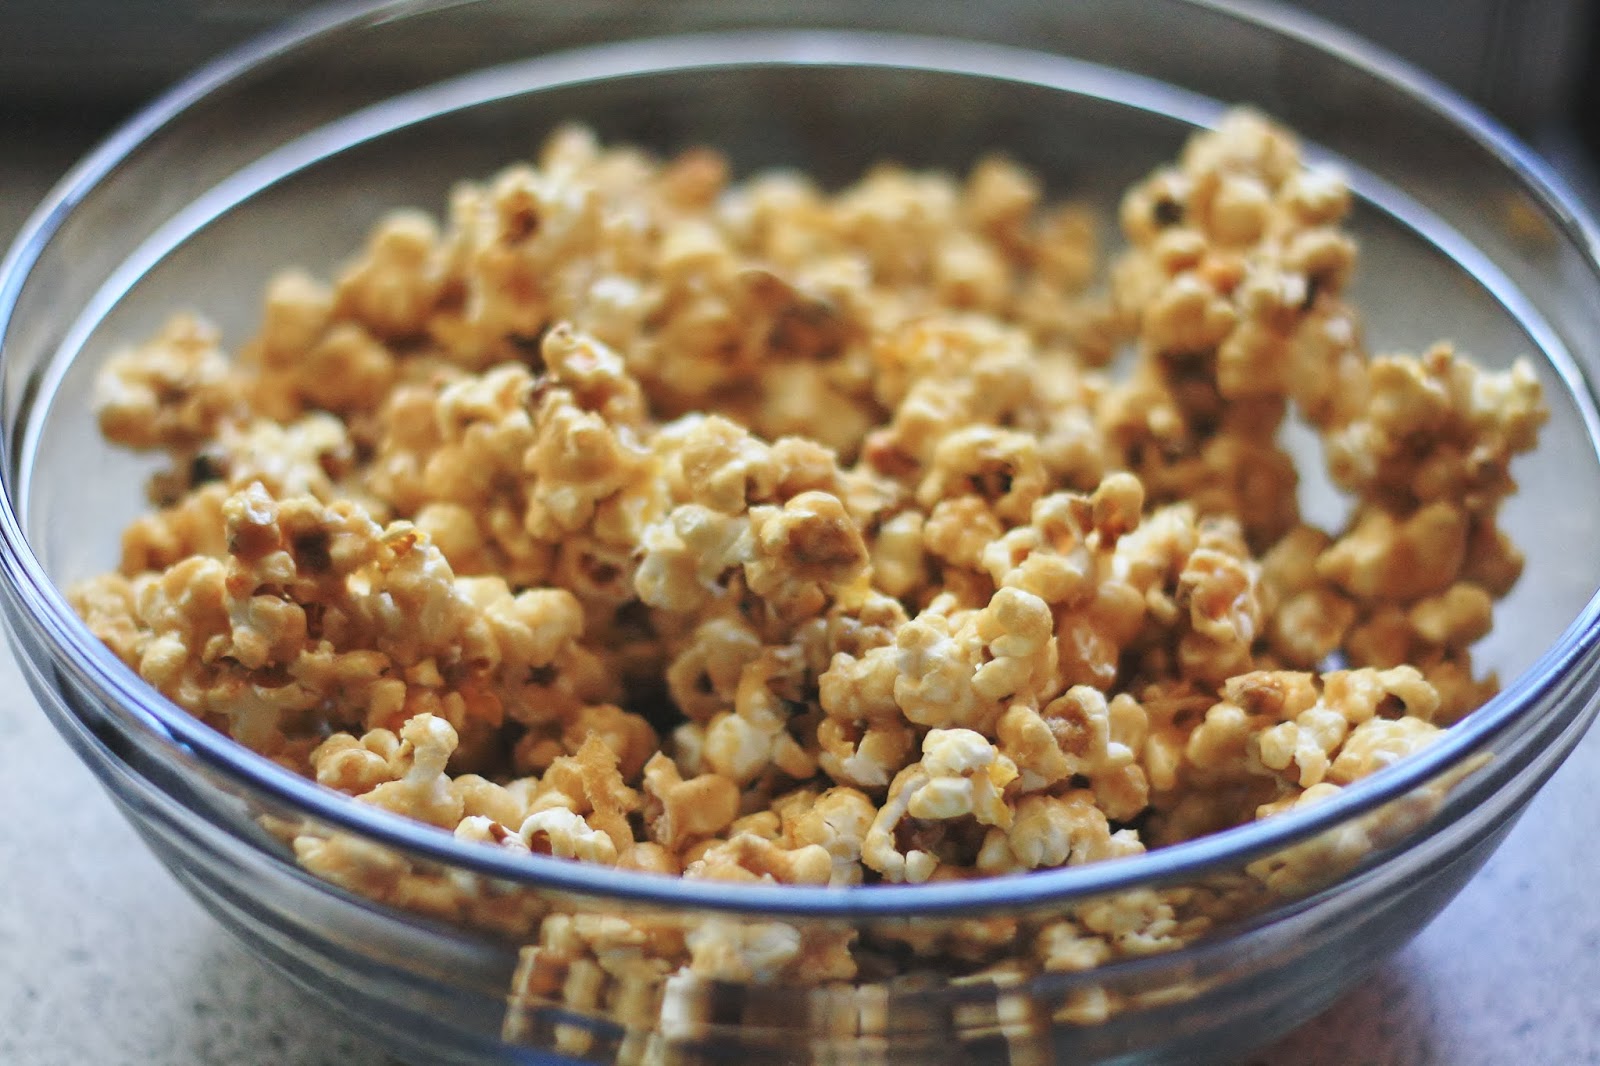
Salted Caramel Popcorn


Being on spring break, I have a bit of extra time, so I decided to try out a new recipe. I had come across several of these popcorn recipes on Pinterest, and decided to try one.

what you'll need:
Olive oil (coconut oil would work too!)
Popcorn kernels
1 Stick of butter
1 Cup Brown sugar
1/4 Cup Corn syrup (light or dark)
1 tsp salt
1/4 tsp baking soda
1/4 tsp vanilla extract


Pour a thin layer of olive oil in your pan, and then add enough kernels to cover the bottom of the pan. Turn the stove on medium heat, put a lid on your pan and wait for the corn to start popping, shaking the pan about every 30 seconds. Start shaking your pan more frequently as the popping increases. Take your pan off the heat when you only hear a pop every 2-3 seconds.


Remove the lid and let the popcorn cool.


 Melt the butter over medium heat, then add the brown sugar and corn syrup, and stir. Once combined, set a timer for 5 minutes and let it bubble over the heat. When five minutes is up, remove from the heat and let it cool for about five minutes.


Pour your now "caramel" mixture over the popcorn and fold in with a spatula.


Spread mixture on a pan and stick in a 275 degree oven for 10-15 minutes.


Let cool, and there you have your popcorn, perfect for movie night, or an afternoon full of  binge-watching Netflix! Careful, this stuff can get addictive.

-Cassidy

Monday, March 3, 2014

Phoenix


Sorry I've been gone for a bit- I took a some what spur-of-the-moment trip to Arizona! I got to see a ton of my family there, and it was an all around beautiful experience. I took minimal pictures because I was so busy, but I thought I'd share a few.
I'm back in Tennessee, and I came home to a snow storm ,which is supposed to last for a few days. So, as gloomy as that is, I guess I should try and appreciate the beauty of the cold weather, as I am trying to see the beauty in all things lately.

-Cassidy

Friday, February 21, 2014

February Favorites


1. Gap sweater: I found this gorgeous waffle-knit sweater at goodwill this month! It has buttons down one shoulder, and I think I'm in love.'

2. Ariana Grande's Teen Vogue shoot: I adore this shoot, Ariana's style is always so spot on.

3. A Chorus Line vinyl: Another diamond in the rough at goodwill. I love this show and for 99 cents I couldn't pass it up!

4. Lemongrass Tea- my mom got this for me at T.J Maxx as a valentines gift- it has a really nice lemon flavor, with a hint of green tea, but it's really light and not bitter at all.

5. Maybelline nail polish in Golden Opportunity- this has been my most used nail polish this month, because it is so forgiving, and matches with everything.

6. Urban Outfitters beanie- I found this gem on sale at Urban while in Knoxville. It's been perfect to throw on when I go out, and keeps my ears nice and cozy.

February has brought some extreme cold, but has also brought a few really lovely and warm days. I hope those days will continue into march, and I am so excited for spring!


Thursday, February 20, 2014

Cara Delevinge & Lily Collins Inspired Makeup


Cara Delevinge and Lily Collins are my main ladies- I love all of their makeup, hair, and style choices. 
They are both known for their statement brows, which have become such a trend lately. (works for me, less tweezing!)
So, I created a makeup look inspired by their bold brows, and smokey eyes. 


I applied foundation, concealer, and powder, then swept on my elf blush
 Next I filled in my brows with my Love and Beauty eyebrow kit.


For the eyes I primed with my Color Tattoo in "Bad to the Bronze." Then I took my Maybelline Palette, and with a blending brush I applied the light brown in my crease, outer edge of my eye, and my lower lash line. Next, I blended the dark brown into my crease, and also took the sparkly bronze color put it on the outer third of my eye and blended into my crease. I took what was left on the brush and swept it on my lower lash line. I then took a black pencil liner and lined my top lash line and the outer half of my lower lash line. I smudged it out with a smudger. Lastly, I curled my lashes and applied a couple coats of mascara.


For the lips I used my pink Baby Lips and a nude gloss. 


This look is perfect for daytime, but also can be amped up with a colorful lip, or a lined waterline and some falsies.
 Go out and rock some bold brows! 

-Cassidy


Wednesday, February 19, 2014

Gold Tipped Mani

I love a good french manicure- that said, I am terrible at french manicures. I always end up frustrated and disappointed with my poor painting skills (maybe I take things a bit too seriously sometimes)

But don't fear, I have created a french manicure that I can actually do! the only "tool" you need is a teeny paintbrush, which I had lying around my house.


You'll need a base/top coat, a sheer pink polish, a gold polish, and optionally a glitter polish.
I am kind of glitter-obsessed, so of course I opted for glitter.


Paint a clear base coat, then go ahead and paint your pink. I used three thin coats to get it as opaque as I wanted. Give your nails about 20 minutes to dry before the next step.


Then, take your teeny-tiny paint brush, dip it into your gold polish, and muster all of your confidence to paint your tip! I found that gold polish is extremely forgiving, especially compared to white polish. 

*tip: rather then moving your brush, move your finger- you'll get much straighter lines

You could definitely stop with the gold, but I took that same brush, dipped it in my glitter and painted over the gold.


And you're done! It's a super simple, but a very classy and wearable manicure. 
I hope you'll try this out for yourself! 
-Cassidy

Saturday, February 15, 2014

Green Tea Facial Scrub


These last few winter months, Green Tea has been a staple in my life, and I've been drinking 2-3 cups a day! It has awesome health benefits, and I think it tastes great (though some may disagree).

Lately I've been concocting a Green Tea  facial scrub, and I think I have perfected the recipe! This mask helps with a variety problems, including acne, acne scaring, and dull skin. It is perfect for all skin types, because it does a great job at balancing your skin. It's great in the winter to add a bit of moisture and bring back a glow, but it is also perfect for year-round use.

*Ladies with oily skin (like myself), don't shy away from this recipe because it has coconut oil- when you rinse your skin with hot water, pat it dry, and wait a few minutes, your skin will soak up all of that oil and you won't have to moisturize!

What you'll need:

-2 Tbs Ground rice or rice flour
Rice flour aids in helping with pigmentation, blemishes, and even wrinkles. It's also very gentle.

-2 Tbs ground oatmeal
Oatmeal is such a gentle exfloliant and is perfect for irritated or super sensitive skin. 

-Green Tea (from two tea bags) 
Green tea has tons of antioxidants, and can even help prevent damage from stress and pollution.

-1 Tbs Honey
Honey is very moisturizing, and is also a natural antibiotic, which is perfect for fighting acne.

-2 Tbs Coconut Oil
Coconut oil is a great moisturizer and is extremely gentle on skin. 


Mix your flour, oatmeal, and green tea.


Warm honey and oil in the microwave, then add to the dry mixture.


Mix it all up and you're done!


Stick into a container, and you have a scrub that is gentle enough to use everyday!
(This scrub will last about two weeks in an airtight container)
I hope you try this out for yourself on a rainy day!

-Cassidy


Thursday, February 6, 2014

Welcome, February


Thus far, February has proven itself to be full of opportunities, which is exiting. 
But, the weather has been much less exiting, with temps in the 20's and 30's, hence why I am shooting in my room. (You'll have to excuse the poor lighting)


 Lately my wardrobe has been  basically a spectrum of black and greys. So, I'm slowly attempting to add some color back in. I saw this sweater at T.J Maxx and immediately loved it because it had a button down back (which I forgot to snap a picture of). They had it in black and purple, and naturally I was drawn to the black- but I decided I should push myself out of my comfort zone and I purchased the purple! (Major, I know)


Sweater // T.J. Maxx
Pants // Local Boutique
Necklace // Old Navy
Midi Rings // Local Boutique
Nail Polish- Sally Hanson, Hibiscus 


I hope your February has been lovely thus far, and when faced with decisions I challenge you to buy the purple sweater this month! (Metaphorically, of course)